Introduction
In part 1 of my previous post, I spoke about how to install and configure the BizTalk Management Service on premise which will allow PowerApps to communicate with your BizTalk 2016 server. In this post I will focus on the next components which are "Components/ Services in Azure".

2. Components/ Services in Azure
In this section I will focus on creating the Azure API App which will be the public endpoint for your on premise resources.
Create the Azure API App
1. Sign into the Azure Portal:
2. Click on App Services, and then Add:
3, Once the blade opens up, in the "Filter", search for API App and then select it:

4. Create the API app by filling in the required fields and then click on Create (You can optionally click on Pin to dashboard which provides easy access to the API App you just created via your Azure Portal dashboard):

5. Once it deploys, open the new API App and you should see the following screen:

Azure Relay with Hybrid connection
Now that you have your public endpoint, how do you connect your Azure API App to your on premise resource?
You could use an On Premise / cloud hybrid application using Azure WCF relay to connect your on premise web service to Azure but I decided to try with a hybrid connection.
What is a hybrid connection?
A hybrid connection can connect to any on-premises resource that uses a static TCP port, such as SQL Server, MySQL, HTTP Web APIs, and most custom Web Services.See https://docs.microsoft.com/en-us/azure/biztalk-services/integration-hybrid-connection-overview.
I was originally planning on using the classic hybrid connection for my Azure API App mainly because it allowed a free pricing tier for the connection to my on premise resource whereas the newer hybrid connection requires a pricing tier of standard and above but unfortunately the classic hybrid is being retired (See this link for more details.). The good news though is that the setup using the new hybrid connection is a lot simpler.
If you still have access to a BizTalk Service you will be able to link it to the classic hybrid connection (I'll make another post later on how to do this) in order to make use of the free pricing tier but in this post I'll be using the new hybrid connection.
But before we begin I'll need to explain a bit about one of the new features in Azure: The Azure Relay (currently in preview) which provides the option of two technologies:
- Hybrid and
- WCF Relay
Both technologies allows Azure to integrate with on premises application integration but I will focus on the hybrid connection as I already mentioned above, it allows you to integrate with line of business applications such as SAP, Oracle and SQL. This section will focus on the components that you need to install an Azure Relay with a hybrid connection.
New hybrid connection
The following steps enable the Azure API App to communicate with an on premise resource using a hybrid connection via an Azure Relay, following from Step 5 above:
1. Scroll down and click on Networking or use the filter and type "Networking" and click on Networking.
2. Click on create new hybrid connection:


3. Enter the required fields for creating the new hybrid connection:


| Field Name | Purpose | Example |
| Endpoint Name | Friendly name for your on premise resource as it will be used by your Azure API App. | AnthonysLaptop |
| Endpoint Host | The machine name for your on premise resource. | BizTalk2016Server |
| Endpoint Port | The port number for accessing your on premies resource | 80 |
4. Click on "OK".
What this does is in the background, it creates an Azure Relay, a service bus endpoint, and finally a hybrid connection associated to your server or host.
This can be seen by clicking on All Resources in the Azure Portal and filtering by Relay:


Installing the On premise Hybrid Connection Manager on Premise
We now need to install the on premise hybrid connection which will tie the resource on premise to the Azure Hybrid Connection.
1. In the Azure Portal, go back to your Azure API App that you had just created.
2. Scroll down and then click on Networking or use the filter and then click on Networking.
3. Click on Click on "Configure your hybrid connection endpoints".
4. Click on "Download connection manager" and save it to disk.
5. Run it using Administrative privileges.
2. Scroll down and then click on Networking or use the filter and then click on Networking.
3. Click on Click on "Configure your hybrid connection endpoints".
4. Click on "Download connection manager" and save it to disk.
5. Run it using Administrative privileges.
6. Read and then accept the terms by clicking on the check box and then Install.

7. Click on finish, once it appears.
8. To configure the connection manager, click on Start, then type "hybrid" and you should see the Hybrid Connection Manager UI appear. Click on it:

9. Once it opens, click on "Configure another Hybrid Connection":

10. Sign in with the same credentials when you log into the Azure Portal.
11. Choose your subscription:

12. If you performed each of the above steps correctly, you will see your hybrid connection here. Click on it and then click on Save.


14. Go back to the Azure Portal and you should see the following screen with your hybrid connection and its status set to "not connected". Click on refresh.


Testing your connection
To test your connection to your on-premise server:
1. Open your Azure API App that you had just created and scroll down to Console.
2. Once the console loads, type tcpping [friendlyname of your hybrid conneciton] in my case it is "tcpping anthonyslaptop" and then press enter.
3. If everything is configured correctly, you should see the following:

This means that your Azure API App is now connected to your on premise server.
1. Open your Azure API App that you had just created and scroll down to Console.
2. Once the console loads, type tcpping [friendlyname of your hybrid conneciton] in my case it is "tcpping anthonyslaptop" and then press enter.

This means that your Azure API App is now connected to your on premise server.
Extensions
You might have noticed that in the Azure API App there is a section called Extensions. You can read more about it here.
The extension I will be using is called the reverse proxy by Eelco Koster. (Project site is https://github.com/EelcoKoster/ReverseProxySiteExtension). The reverse proxy allows the Azure API App to forward requests to your on premise resource(s) using the hybrid connection.
1. In you Azure API App scroll down (or use the filter) and click on extensions and then click on Add:
 2. Scroll down to ReverseProxy and then click on it.
 3. Read the legal terms, and then click on the "OK" on the right, and then click "OK" again.
 4. Once it is installed, click on the ReverseProxy extension to open it, and then click on Browse:
 5. Once the browser opens, you will see the configuration screen for configuring the ReverseProxy:

I won't go into too much details of how the reverse proxy works but for those that are interested, you can always visit his project site for more info.
6. Replace the xml with the following, replacing the "<servername>" with the friendly name of your hybrid connect and finally click on "Save to web.config":
<rewrite>
<rules>
<rule name="BizTalkManagementRule" stopProcessing="true">
<match url="^BizTalkManagementService/?(.*)" />
<action type="Rewrite" url="http://<servername>:80/BizTalkManagementService/{R:1}" />
</rule>
<rule name="BizTalkOperationsRule" stopProcessing="true">
<match url="^BizTalkOperationsAPI/?(.*)" />
<action type="Rewrite" url="http://<servername>:80/BizTalkOperationsAPI/{R:1}" />
</rule>
</rules>
</rewrite>
The first rule (BizTalkManagementRule), essentially will forward any REST API calls to your on premise server whereas the second rule fires my custom on premise REST API that I built.
1. In you Azure API App scroll down (or use the filter) and click on extensions and then click on Add:


6. Replace the xml with the following, replacing the "<servername>" with the friendly name of your hybrid connect and finally click on "Save to web.config":
<rewrite>
<rules>
<rule name="BizTalkManagementRule" stopProcessing="true">
<match url="^BizTalkManagementService/?(.*)" />
<action type="Rewrite" url="http://<servername>:80/BizTalkManagementService/{R:1}" />
</rule>
<rule name="BizTalkOperationsRule" stopProcessing="true">
<match url="^BizTalkOperationsAPI/?(.*)" />
<action type="Rewrite" url="http://<servername>:80/BizTalkOperationsAPI/{R:1}" />
</rule>
</rules>
</rewrite>
The first rule (BizTalkManagementRule), essentially will forward any REST API calls to your on premise server whereas the second rule fires my custom on premise REST API that I built.
Note:

http://<AzureAPIAppName>.azurewebsites.net/BizTalkManagementService/Applications

Important: Please note that the site is unprotected (http and NOT https) and has no security. I will be posting my tutorial on securing this later..
- This configuration assumes that when you installed the feature pack, it is installed with the default application name of BizTalkManagementService.
- Additional on premise REST API's can be created. All that needs to be done is to modify/ update the rules in the configuration above.
7. Once saved, switch back to the Azure Portal and browse back to your Azure API App and finally in the overview, click on the restart button.

8. This will ensure, that the extension and the proxy has taken affect.
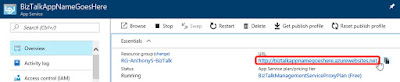
9. Once the restart is complete, browse to the Azure API App by clicking on the URL for your Azure API App:

Testing the Azure API App
Once the website opens for you Azure API App, enter the URL for the on premise BizTalk Management API. E.g.http://<AzureAPIAppName>.azurewebsites.net/BizTalkManagementService/Applications

Important: Please note that the site is unprotected (http and NOT https) and has no security. I will be posting my tutorial on securing this later..
Conclusion
In this second post, I demonstrated how to create an Azure API App, setup a hybrid connection to your on-premise resource, how to link an Azure API App to your on premise server as well as setting up a reverse proxy so that your Azure API App is able to access your on premise resource. In the next post I'll be talking about setting up PowerApps to make use of your Azure API App..
No comments:
Post a Comment